To go one further, /u/PlainBen & /u/CtrlAltFyn even modeled this sketch into a great 3d helmet.

Now, Andy has done a lot of pretty great things for the Halo costuming community. In particular, our group has had the opportunities to be front row for Halo comic conventions, tour 343 studios, enjoy silly but awesome photoshoots and so forth. Andy helped set a lot of those up and has always made sure we were taken care of. We figured one of these days we should repay him for all he's done for us.
One day, members of our costuming group from Oregon, San Francisco, Los Angeles and Mission Viejo banded together and made a plan. We were going to find the redditor that modeled the helmet and see if he minded awfully if we used that model to make The Bravo Helmet.
/u/Plainben & /u/CtrlAltFyn graciously allowed us to use the model and Jeremie Sloan up in Oregon printed the helmet in sections. It was then sent to me and I began the next steps.

Assembling the helmet was pretty straight forward, find which pieces go together, and I used a plastic epoxy to adhere all the sections together.

As you can see, with all the striations and little grooves from where the pieces met up, there would need to be some smoothing and filling.

There was a long process of using bondo spot putty, bondo putty, filler primer and a lot of sand paper, filing and smoothing. It was at this point that I was going to need some help. I spent some days up at Shawn Thorsson's shop, of Thorsson & Associates, to get the helmet properly prepped, molded and cast. We did decide to use this project as a great video tutorial. I implore you keep an eye on Shawn Thorsson's facebook to see this thing being made in the form of informational videos!

After we added in some details, some proper grooves, and other aesthetic features to finish the look, we ended up giving it a coat of pink, glossy primer.

After we got the prototype all set, it was time to start the molding process. Since we didn't want to use the 3d printed helmet as the final product, we figured we would mold the helmet so we could make more than one in case we broke one or needed to make changes. I won't go too far into detail into the molding process, but after Shawn considered the best way to mold the helmet, we decided to split the mold in half, down the front/back halfway point. This would mean the cast helmet would be able to be released from the mold without damaging the mold by not having any unecessary yanking, pulling and stretching.

The process is... slow. In order to pour rubber silicone over half the helmet, we had to build a platform that only showed half the helmet, and then we had to make a giant clay dam of sorts to keep all the silicone together and not let it pour out. The stuff takes a long time to cure, so having a clay bed to keep it all in one place is necessary.

Once one side was covered in pink silicone (We used Mold Max 30), we let it cure and the following day, the other side got the same treatment from Shawn. So now what we would have is a prototype helmet inside, with a giant pink rubber jacket that was in two halves. Now the rubber is pretty floppy on its own, so making casts of the helmet is tricky unless you have another, rigid jacket on the outside of the silicone. This is done in the form of a fiberglass shell. Again, I won't go too much into the details of the process, but the idea is just to have a hard shell to keep all the floppy rubber in shape.

This is the silicone mold with its fiberglass shell. The 'dimples' are to help make sure you are putting the fiberglass shell on the correct way, and prevents it from slipping out of place.
Now that the mold was done, we needed to get our prototype out of the mold. We took the fiberglass shell off (after adding a way to clamp the two halves back together) and peeled the pink silicone off of our prototype. That prototype had now served its purpose.
So now we had an empty silicone mold, and it was time to try to make our first one! We mixed up some Smoothcast 65d and poured the liquid resin inside the mold. We used the rotocasting method to cover the inside of the silicone with a thin plastic shell. To make sure this helmet wasn't too thin, we added a few more batches of liquid resin to add some thickness to the whole thing. The trick here is to not add so much that the helmet is too heavy to wear, and not add enough to where a strong breeze would crack it.
Our first cast was a success!

We now had a hollow, plastic shell of a helmet. It needed a little clean up and a quick sanding to get it ready for painting.

After using paint primer, I went through the steps of painting in layers to get the color scheme. It involved a lot of meticulous masking tape work, and planning on how to paint the colors in a way that minimized the amount of taping needed.

A clean helmet is no fun. No one wants to think that Bravo does all his heroic deeds without breaking a sweat so I added some weathering to the helmet to make it look battle used. This was mostly done with some black wash paint, silver and dark grey/black model paint and some nifty brushes/brush strokes.
Next thing was to give it a signature Halo style visor. I brought the helmet down to Mission Viejo to our buddy Jose at Armory Props and had him install one of his signature LED lit visors.

It was just about finished! Just one last thing...
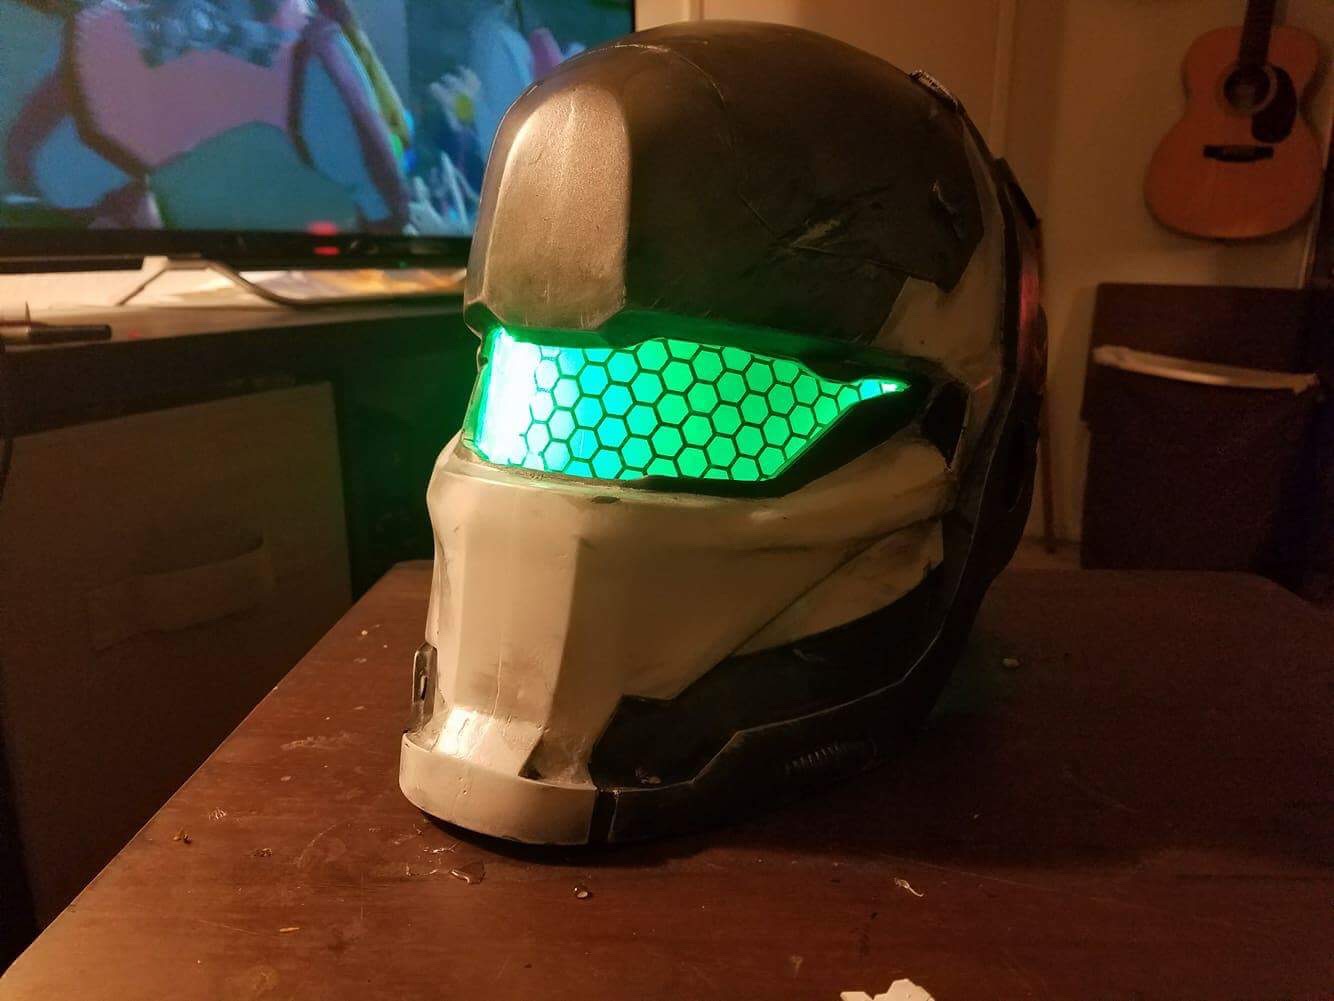
It glows!

Shawn made a few of his own variants that turned out great. I'm actually a huge fan of the chief colored one!
We were graciously invited to the Halo Championships in LA this past weekend where we had collaborated with some 343 members to get this helmet presented to Bravo. After the championship ended, we had the opportunity to finally give Bravo his surprise gift.

I was sporting my Emile suit for the presentation, which, I must admit, is hard to see/hear out of. Bravo soon joined our ranks of not being able to see or hear when he tried the helmet on. It soon became apparent to him why he always saw us running into walls and people when we're in costume.
You may have seen the video already posted of our presentation, but this one we took shows a little more of the introduction and aftermath.
So to sum up, thank you /u/PlainBen & /u/CtrlAltFyn for helping me get a hold of the 3d files you guys so skillfully created, thank you Jeremie for printing the helmet, thank you hugely, Shawn Thorsson, for helping me prep, mold and cast the helmet, thank you Jose for helping us get this helmet an amazing visor and oh yeah -
Thanks for all you do, Bravo!
- Starside Armory
Shawn Thorsson of Thorsson and Assosciates handled the video documentation of the prep, mold and cast steps and will be publishing them in the near future it sounds like so keep an eye out for that as well if you want to see this thing get made and learn how we did it even more so!